

 |
||||||||||||||||||||||||
 |
||||||||||||||||||||||||
 Sign my GuestMap! It's a guest book with a map so you can show what part of the world you're from. |
||||||||||||||||||||||||
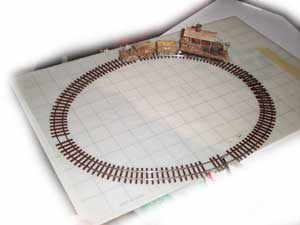
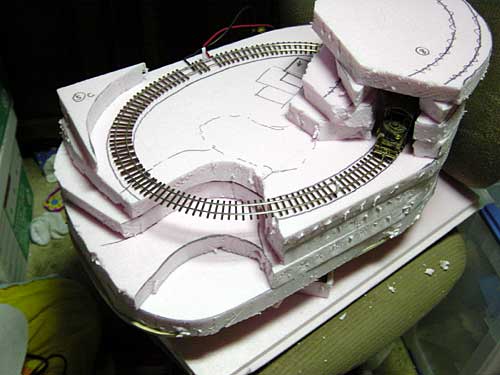
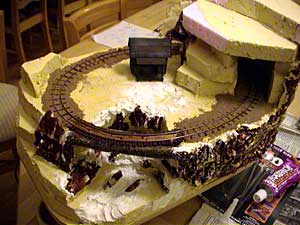
| The beginning of the HOn3 Micro Layout. The track is one piece of 3' flex track The inside rail was shortened by about 3" and the joints stagered so they won't kink. I flexed the track as straight as I could while soldering the joints. The layout size will be 11" by 17" with the corners rounded. I plan on having a mountain, tunnel, lake, waterfall, trestle, big trees, small cabin, and a fisherman with a tent. 1/2/03 | ||||||||||||||||||||||||
 |
||||||||||||||||||||||||
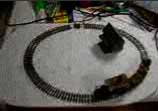
| Click on the picture to see a 21 second MPG (about 530K) file of the Climax going around the loop. | ||||||||||||||||||||||||
|
|
||||||||||||||||||||||||
 |
||||||||||||||||||||||||
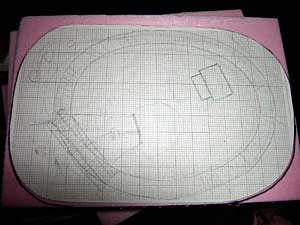
| Here is the sketch of what I would like the layout to look like. Eventually I will scan it to see if it turns out better.
1/4/03 |
||||||||||||||||||||||||
 |
||||||||||||||||||||||||
|
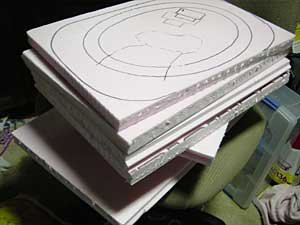
This pictures shows the stack of styrofoam I plan on using.
1/4/03 |
||||||||||||||||||||||||
 |
||||||||||||||||||||||||
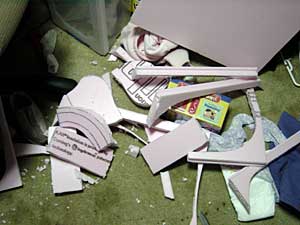
| Here's the mess of leftovers after cutting.
1/4/03 |
||||||||||||||||||||||||
 |
||||||||||||||||||||||||
|
The basic contours are cut with clearance for the loco through the tunnel.
1/4/03 |
||||||||||||||||||||||||
 |
 |
|||||||||||||||||||||||
|
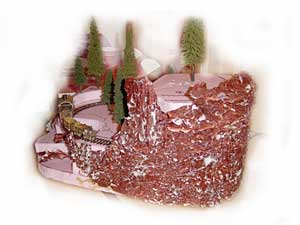
Trees and rocks have suddenly grown. The trees are detailed ready-made. The cliff face still needs to be painted. The color is from the mold release. It was made using products from Bragdon Enterprises. I had run out of their cast satin and tried a different product from someone else. It was a horrible mess! I immediately ordered some more cast satin and they shipped it right away. Great service!
1/24/03 |
||||||||||||||||||||||||
|
|
||||||||||||||||||||||||
|
I made a wood base out of 9 layer maple plywood. It's stained with a clear lacquer and looks real nice but unfortunately will not be seen much, being on the bottom, but it will give it a sturdy platform for the rest of the layout. No pictures but at least it's something as far as progress goes! Can you believe my sister, from across the room, thought it was fluffy cotton candy? (The pink foam board.) How rude. She really knows how to tease me about my hobby! And my mother-in-law thought it was a cake. She saw the brown cliff side. She was also across the room without her glasses on. I guess it didn't help being in the kitchen with everyone thinking about food!
2/19/03 |
||||||||||||||||||||||||
 |
||||||||||||||||||||||||
|
I've finally got the tie spacing the way I wanted it. Since I used one piece of flex track in such a tight circle the ties were really close together. I wanted them further apart to give it more of a short line look. I took off approximately every other tie except for the bridge area where they are very close together.
2/23/03 |
||||||||||||||||||||||||
 |
||||||||||||||||||||||||
|
The first coat of paint is on! I added some Hydrocal and carved it a little to form the lake and riverbed. I also added more of the cast satin cliff pieces that were leftover or broke off to form more cliffs and the waterfall area. It's looking really good now!
2/26/03 |
||||||||||||||||||||||||
 |
||||||||||||||||||||||||
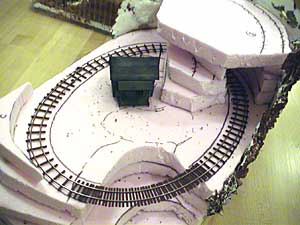
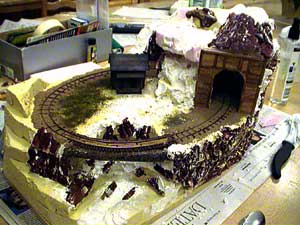
| A little more of the mountain side is forming and the scratch built wood portal is installed. You can also see in the background my shoebox organizer so I can clean up the kitchen each night.
2/27/03 |
||||||||||||||||||||||||
|
It's interesting to note that the last three pictures are taken with a different camera. It will be nice to get my camera back.
|
 |
|||||||||||||||||||||||
|
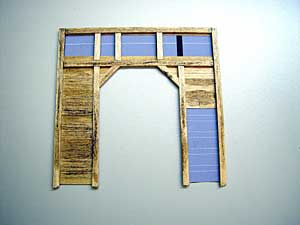
Here is the scratch built wood portal being built. I created a templete on the computer from measuring the actual space and looking at a photo I took.
2/27/03 |
||||||||||||||||||||||||
 |
||||||||||||||||||||||||
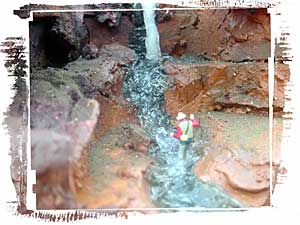
| This photo and the next are still frames from video that I took. My good camera will be back in a couple of days so then I can post some more detailed photos. In the meantime you can see the progress I made on Saturday.
3/3/03 |
||||||||||||||||||||||||
 |
||||||||||||||||||||||||
|
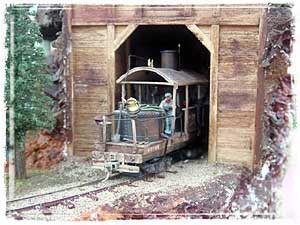
The Climax exiting the tunnel portal. I like the progress I've made but I still have a lot of little details left to add. Did you spot the fisherman in the above photo?
3/3/03 |
||||||||||||||||||||||||
|
|
||||||||||||||||||||||||
|
Click on the following pictures for a larger verison.
|
||||||||||||||||||||||||
 |
||||||||||||||||||||||||
| Overview of the layout. It's not done but it's lookin' good!
3/5/03 |
||||||||||||||||||||||||
 |
||||||||||||||||||||||||
|
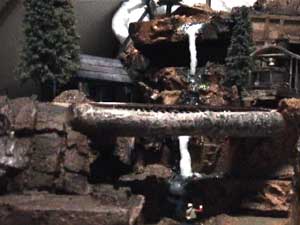
Greeley's Place by the lake. The lake is not very big but it has some fish. (There's a lot of other details still to be added.)
3/5/03 |
||||||||||||||||||||||||
 |
||||||||||||||||||||||||
| Papa John fly fishing! Can you see the fish he's going after? Mabe in the enlarged image.
3/5/03 |
||||||||||||||||||||||||
 |
||||||||||||||||||||||||
|
The Class A Climax coming out of the portal.
3/5/03 |
||||||||||||||||||||||||